
How I make my limited-edition giclée prints
I put a lot of care and attention into crafting each one of my limited-edition giclée prints. I photograph my paintings, do post-processing and make all my prints in my studio in Toronto’s Distillery District, and no print leaves my studio until I am completely satisfied that the colour is completely true to the original and that the quality meets my high standards. I’m lucky to have my husband, Paul, help with some of the more technical aspects of production, which lets us keep the entire process in-house and lets me exercise complete control over all aspects of it.
Making prints of paintings is quite an involved process and most definitely not like putting the painting into a colour Xerox machine.
First, we have to digitize the painting, i.e photograph and post-process it.
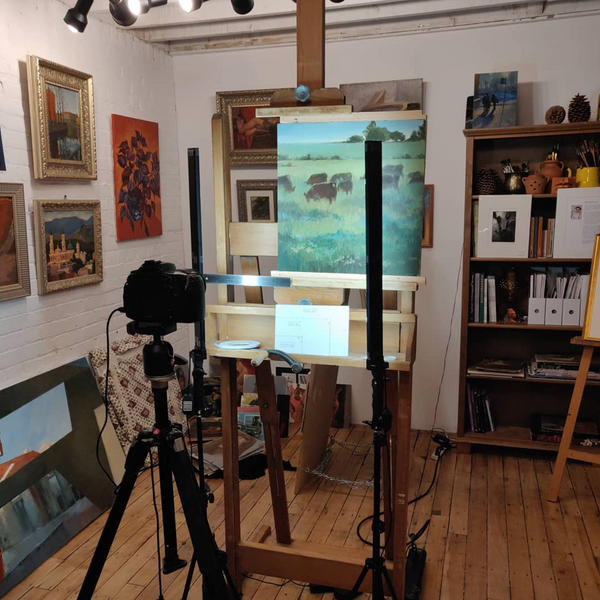
We take pictures of smaller overlapping parts of the picture and then stitch them together. For example, we need about 16 photos to stitch an image for an 18x18" painting at 450 dpi. At some point we'll invest in a camera with more megapixels so as to take fewer photos, but we've gotten pretty far with our old 12MP Nikon D90 and a macro lens! Even with a pretty expensive 40MP camera you’d have to stitch images because cameras in general don’t make very good scanners.
Lighting is pretty tricky. Most of my oil paintings are highly reflective. Lighting the canvas from a shallow angle helps but it's not enough. After a lot of experimentation, we put polarizing film on the lights and a polarizing filter on the lens and it's highly effective! The nice part is that if you're shooting only a small portion of the painting at a time, you only need to light up that portion of the painting and the lights don't have to be extremely strong. I keep the lights and the camera in a fixed position and move the canvas around (which is why you'll see I have a scales marked on the sides of the easel so that I know how much I moved the canvas). I got a very nice old studio easel with a crank recently, which means our process is even more efficient!
Once we’re happy with the individual photographs, they need to be stitched together to make the complete high-resolution image. Stitching is mostly automatic but there’s some art to it and occasional elbow grease is required.
Then it’s time to do retouching. Paintings get scratched and they attract dust over time, some of which might even have been covered by a layer of varnish! So we painstakingly comb through every inch of the painting and ensure that no embarrassing little defects will go into the print.
Then it’s time for colour correction — the part where I make sure that as an artist I’m completely happy with the colour of the print that goes out. I usually aim for complete fidelity to the original, but occasionally it can be an opportunity to improve the painting (increase contrast, make the blacks stronger, etc.) Since I am the artist, I am allowed to do that when making the reproduction.
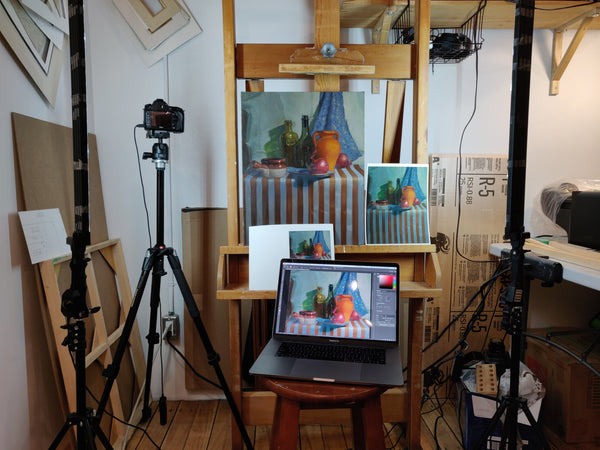
Without any doubt, colour correction the most laborious part of the process, second only to the photography. We print the proofs and compare them to the original in different lighting conditions (as they might be in my patrons’ homes) and tweak the image until the art director (me) is completely satisfied.
Then we print. All of my prints are made on heavy 330 gsm acid and lignin-free archival cotton rag paper using pigment inks. Time will tell, of course, but the manufacturer claims that my customers will get to enjoy these prints for 200 years and more, presuming that our life expectancy catches up with our printing technology.
While it’s printing, I make, print and sign a Certificate of Authenticity (a very important document, and therefore it’s on thick cotton paper with an embossed silver pattern around the border). It definitely adds to the experience of unpacking the print for the customer, and, well, it is important.
Once the print is done, I sign and number the print (first carefully checking and updating my registry to make sure the number is right — I take making limited edition prints very seriously and, well, my reputation does depend on not being sloppy about it).
Then I put on pretty white cotton gloves and trim the print. If I’m matting (and/or framing) the print for the customer, I cut the mat, mount the print on the acid-free backing board and attach the mat to the backing board with adhesive tape.
With all that done, I pack the print, protecting the print surface with glassine and ensuring proper moisture insulation and protection against damage during shipping. And off it goes!
This is all pretty technically involved, and not every artist can afford the time to do this or has a technically-inclined husband sitting around. Luckily, there are people like Dimitri Levanoff out there who will help you through every step of the process. He's a consummate professional and a perfectionist and I can't recommend his Toronto Imagefoundry art printmaking studio highly enough.